Authenticating with WHOOP
Postman is an application you can use to make, save, and share API requests. It includes the functionality to complete an OAuth 2.0 flow for user data. Being programming language-agnostic, it may be a great starting point to validate your credentials are functioning.
Environment Setup
The Postman collection used here requires that you set up the Client Secret information from the WHOOP Developer Dashboard, and you saved the data as Postman variables.
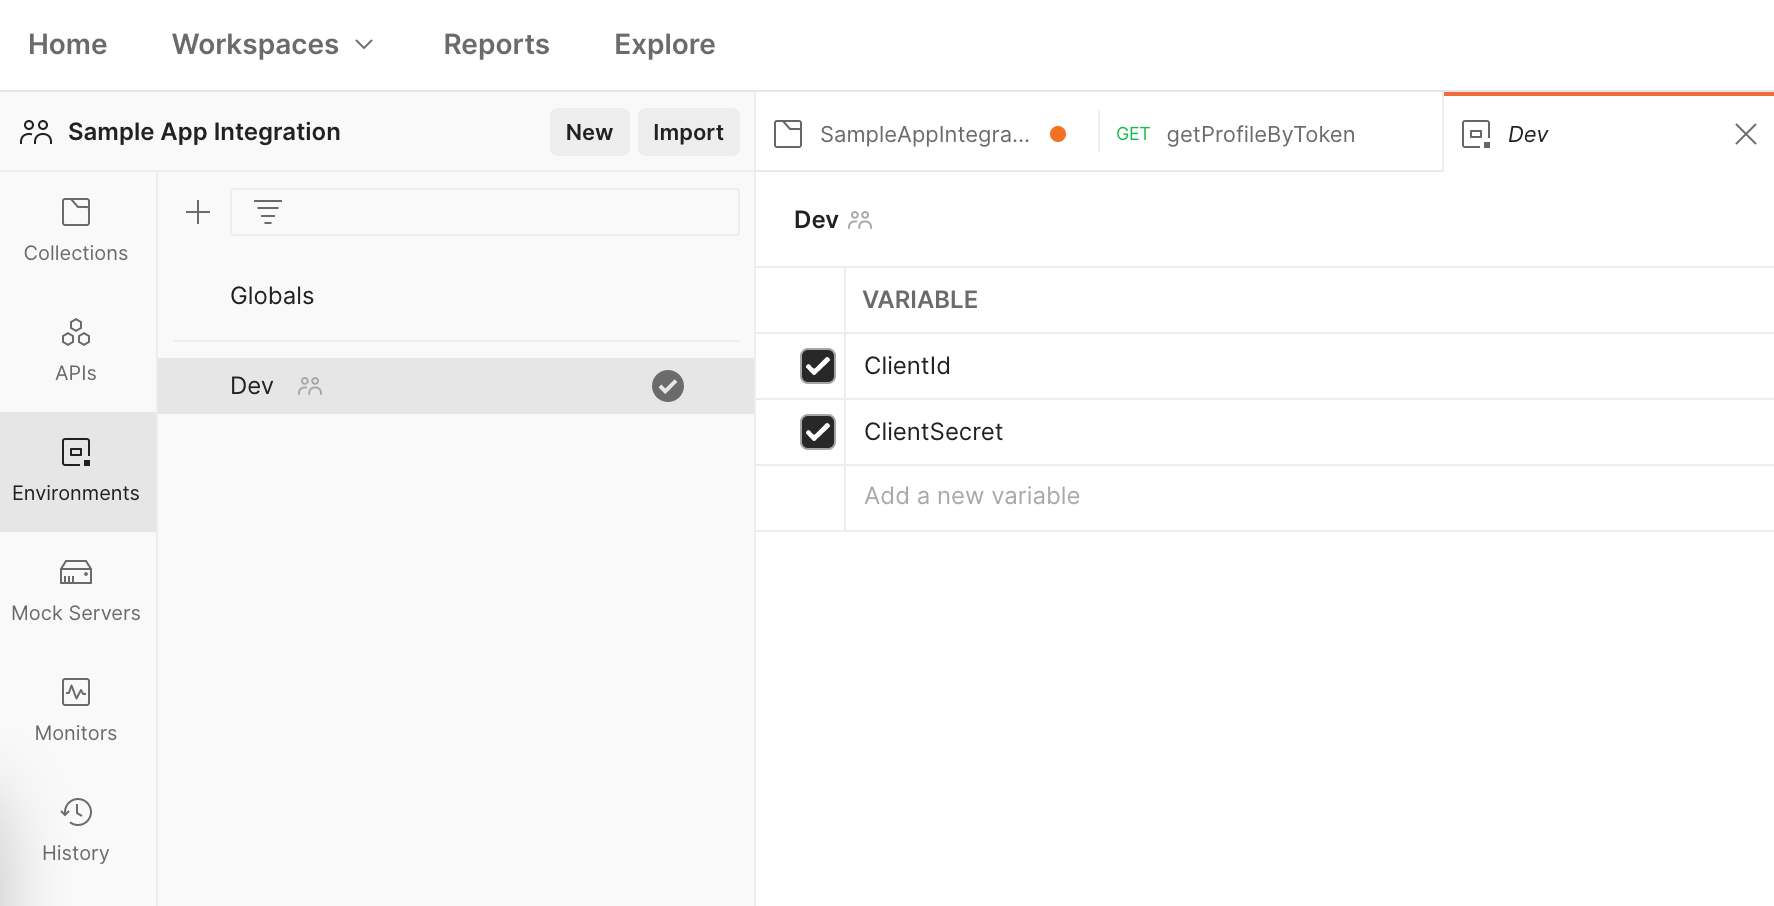
In the Postman app, navigate to the "Environments" section on the far left. Then, add or modify two variables in the main content window:
ClientId- this is the unique client Id from the WHOOP Developer Dashboard.ClientSecret- this is the secret for the client Id from the WHOOP Developer Dashboard.
In addition to naming these variables, fill in the values with the credentials from the Developer Dashboard.
Note: The screenshot does not show that information to avoid sharing credentials.
Now you're ready to use those values as variables for the rest of the flow, and don't need to share the actual secrets in the saved requests.
Starting the Authorization Flow
Postman includes support for completing the OAuth 2.0 flow. This section will show you how to give Postman access to your WHOOP credentials for future requests.
Navigate to the "Collections" section on the far left, and select the collection name for the WHOOP API in the pane to the right of that.
Next, select the "Authorization" heading in the main content window. It should be underlined in orange.
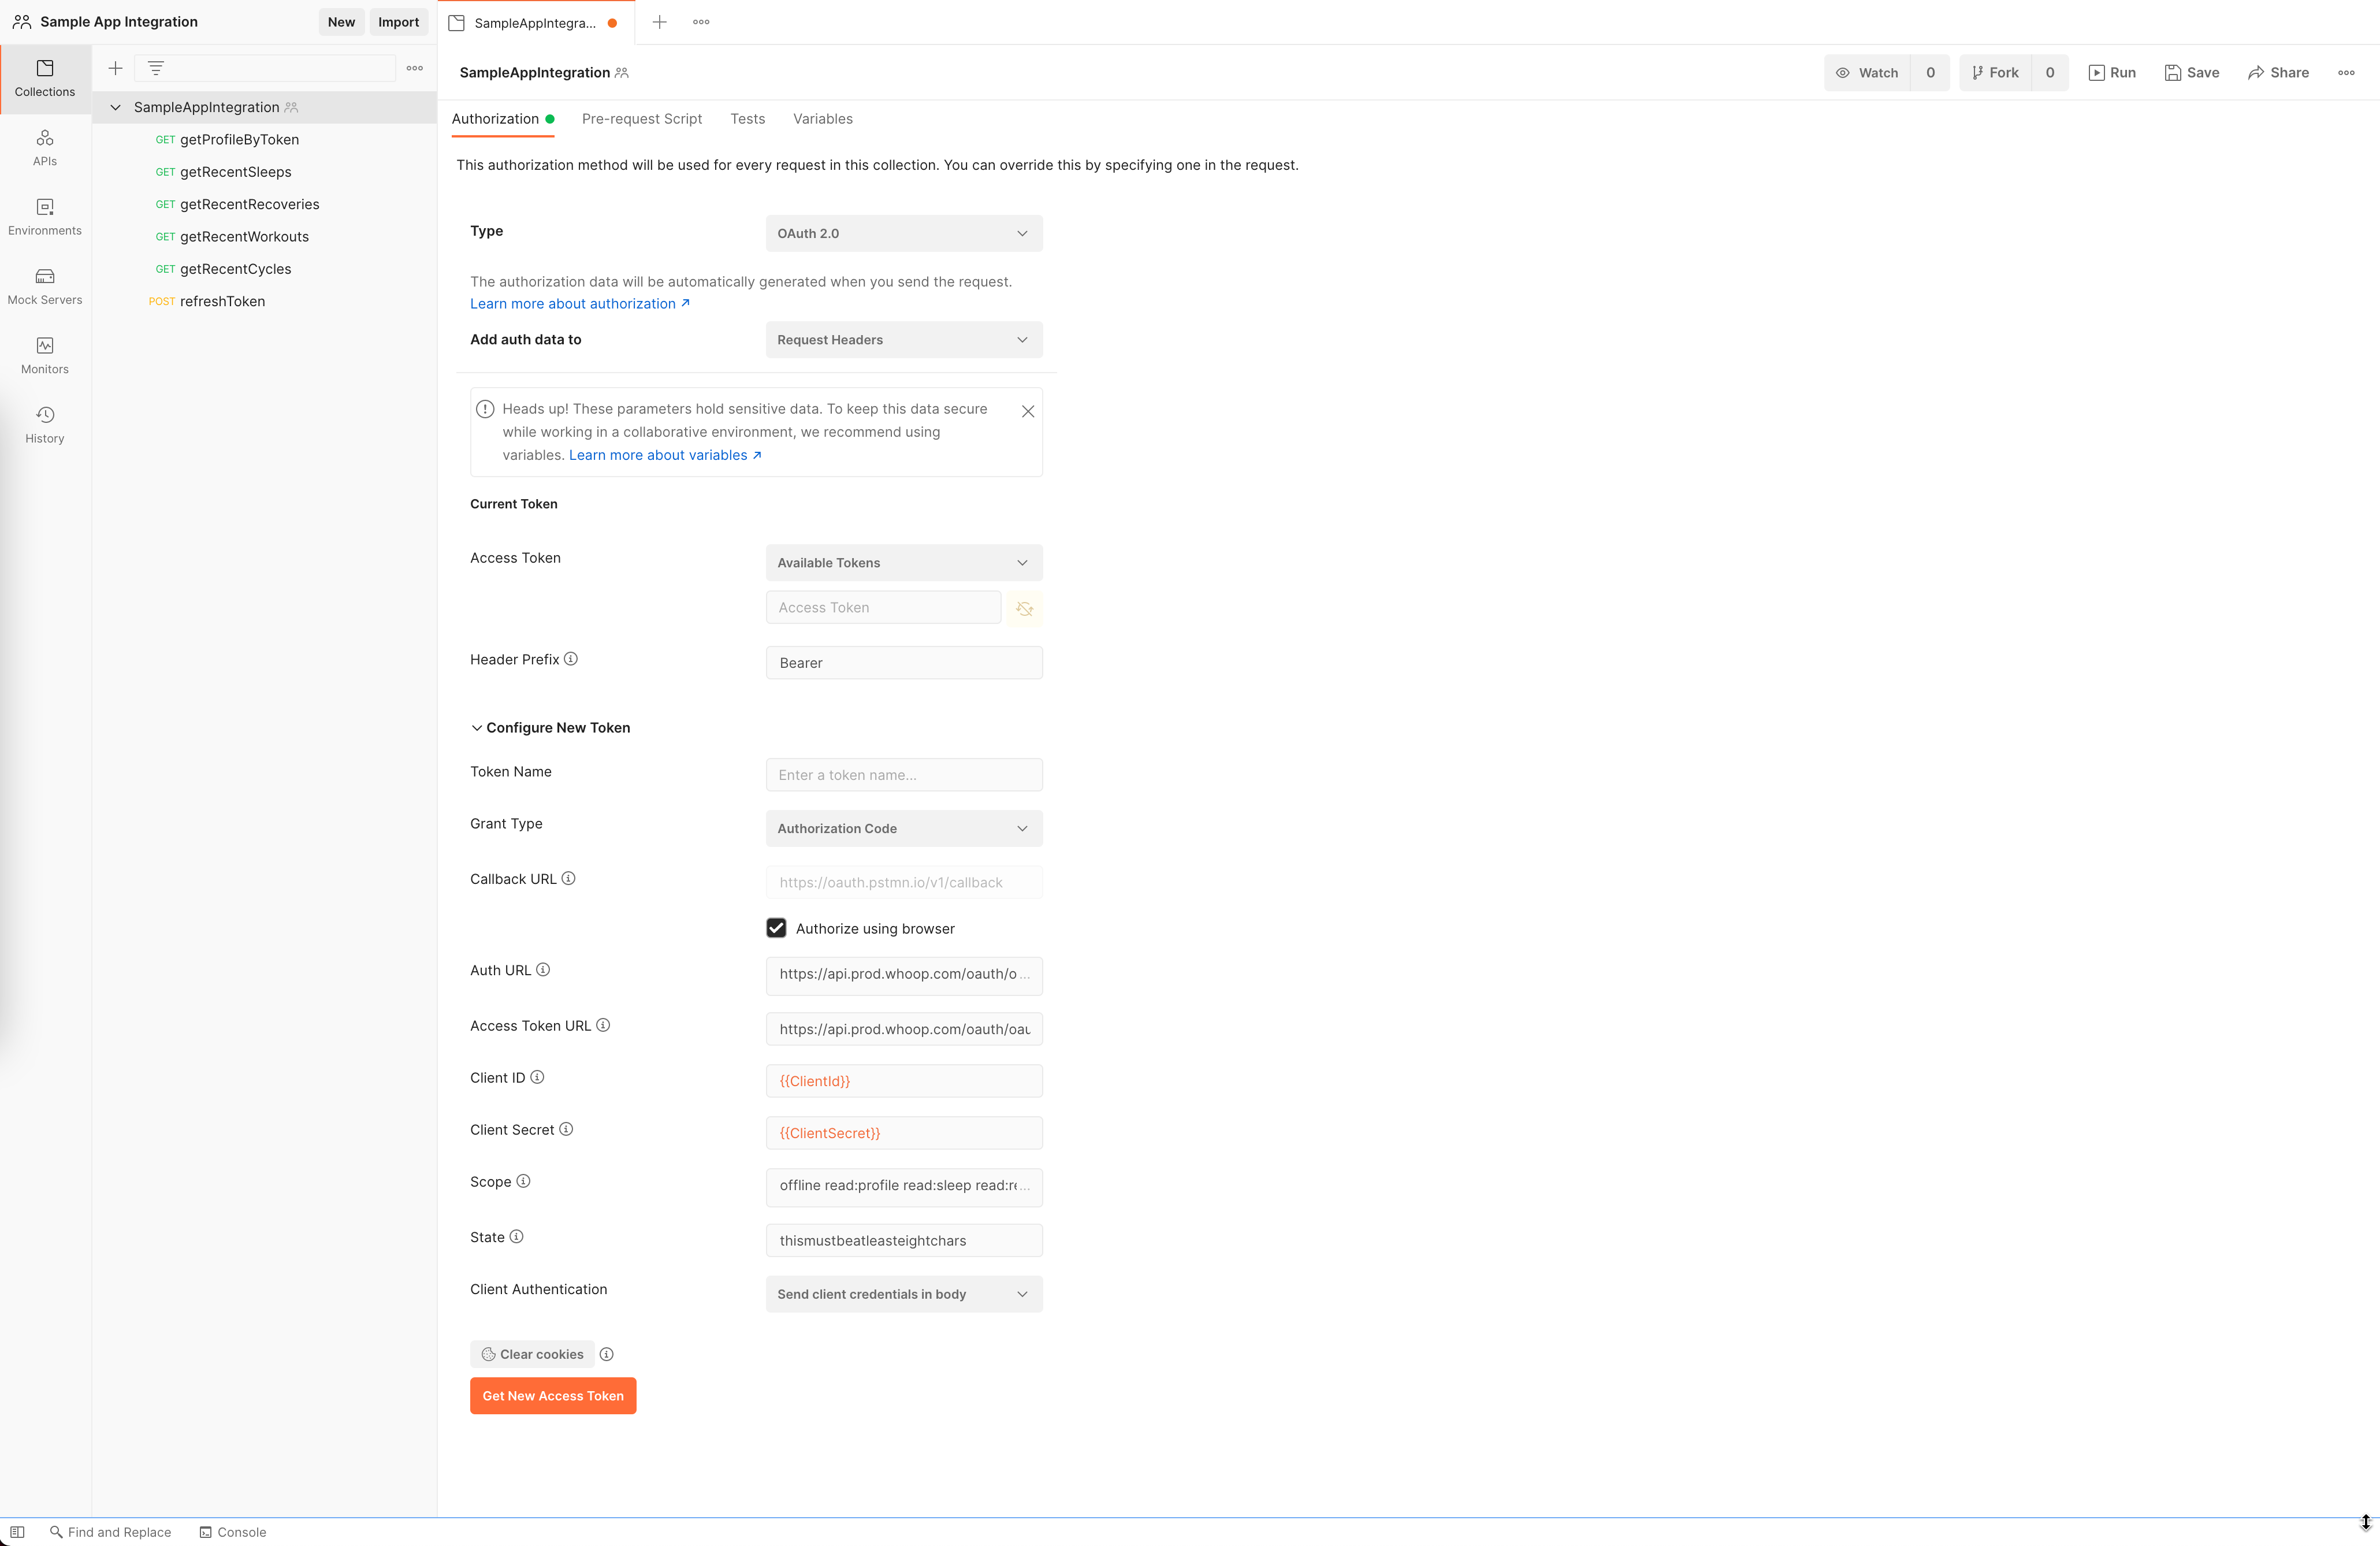
Fill in the fields as follows:
- Type: OAuth 2.0
- Add auth data to: Request Headers
- Access Token: Available tokens
- Header Prefix: Bearer
- Grant Type: Authorization Code
- Callback URL: check "Authorize using browser"
- Auth URL:
https://api.prod.whoop.com/oauth/oauth2/auth- Learn more. - Access Token URL:
https://api.prod.whoop.com/oauth/oauth2/token- Learn more. - Client Id:
{{ClientId}}- this is using the variable updated earlier. Learn more. - Client Secret:
{{ClientSecret}}- this is using the variable updated earlier. Learn more. - Scope: A space-delimited list of scopes to request data access to. Learn more.
- State: A string that must be at least eight characters long to be sent to the WHOOP server and used for verification. Learn more.
- Client Authentication: Send client credentials in body
Lastly, click the "Get New Access Token" button, and Postman will make the request to WHOOP's Auth URL specified above.
Sign in to WHOOP
Postman should then redirect to a browser window and present WHOOP's sign-in form.
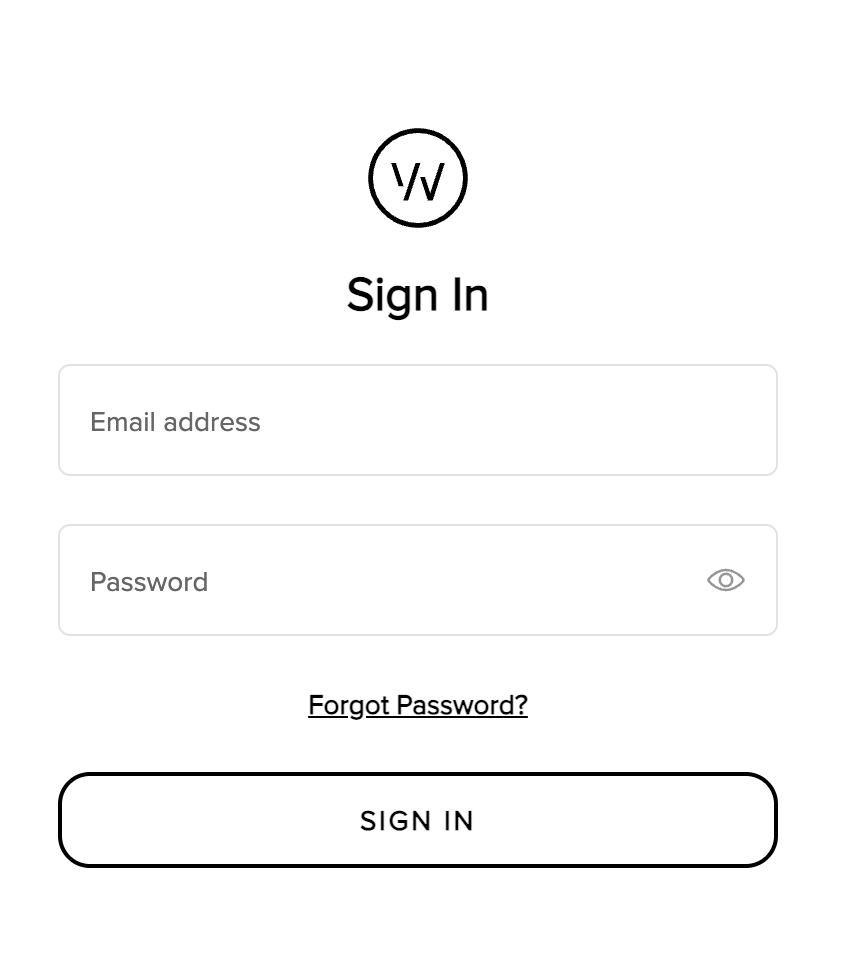
Fill in this information with the account information that Postman will use in future requests to access data.
Click the "SIGN IN" button after providing the account information.
Authorize Access to WHOOP Data
After providing valid WHOOP user account credentials, Postman will redirect you to a WHOOP log-in asking you to authorize your app and displays the requested scopes as part of the OAuth flow. These are all the scopes that were requested in Postman earlier.
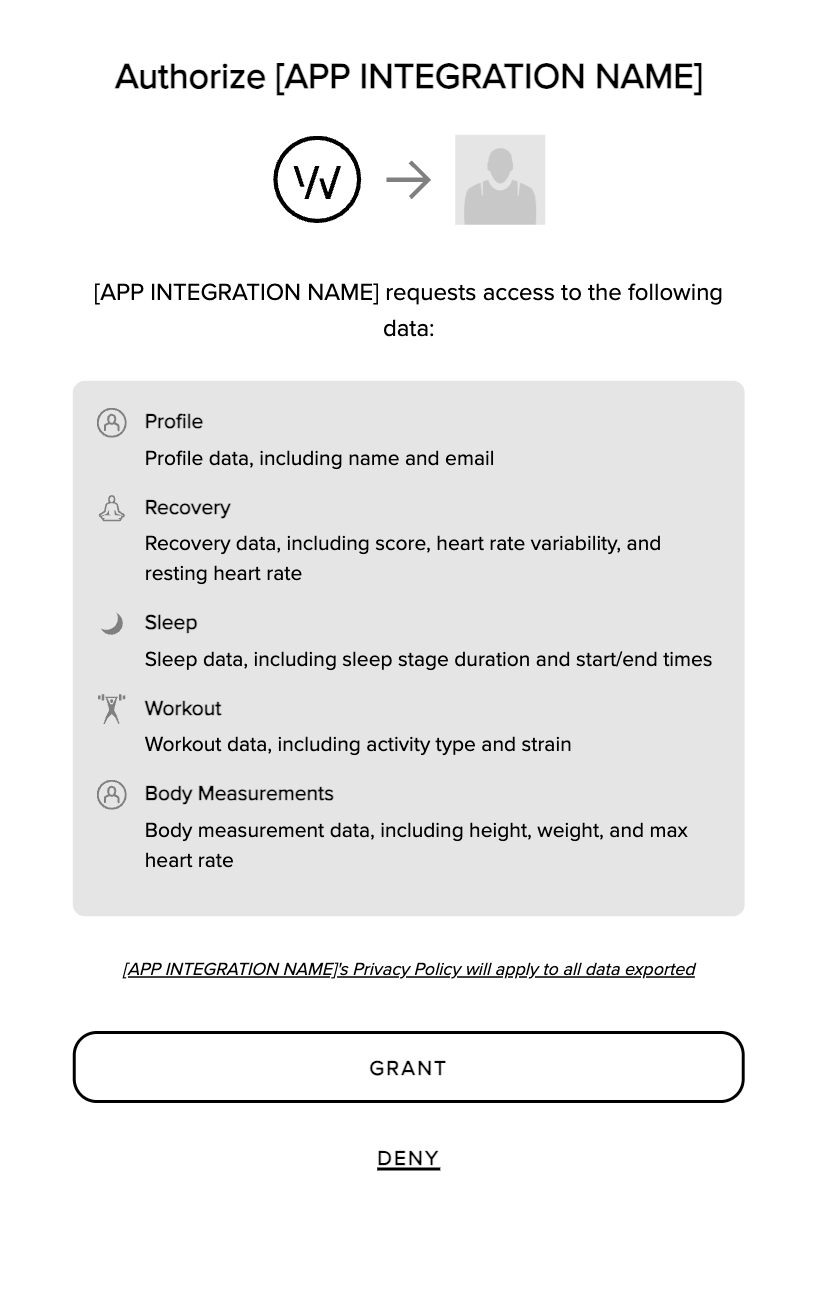
To complete the flow, you must grant the application access by clicking the "GRANT" button.
Depending on your browser, you may receive an alert to redirect you back to the Postman app. Please do so to complete the round-trip.
Manage Access Tokens
After completing the redirect, Postman will next show a modal that displays all of the token information returned from WHOOP.
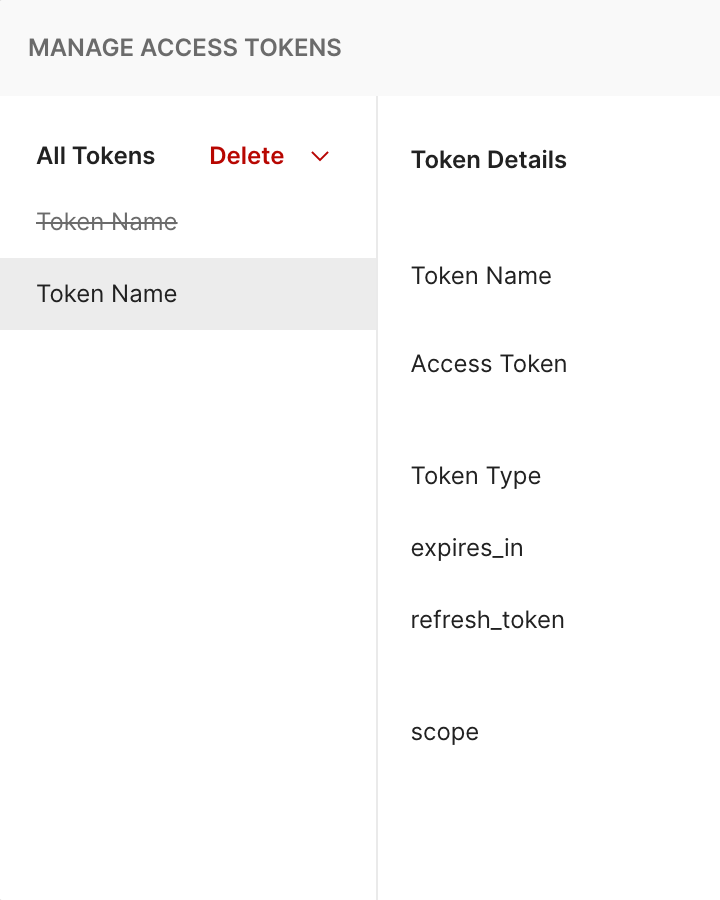
Once again, this screenshot purposely censors the actual values of these tokens to not share personal information.
If you want to use the refresh_token in Postman to request a refreshed
token, you will need to copy this value at this point and save it somewhere
safe. Postman does not retain access to this data.
You will use the Access Token in future requests, and you can save those credentials in Postman.
Use Access Token
Click the "Use Token" button on the right in the Manage Access Tokens modal.

For this to persist on future requests, that change must be saved by clicking the "Save" button on the far right of the collection after leaving the modal.
![]()
Congratulations
You have completed the OAuth 2.0 flow using Postman, and you can make additional requests for WHOOP data using this token in Postman.